> For the complete documentation index, see [llms.txt](https://docs.imerit.net/llms.txt). Markdown versions of documentation pages are available by appending `.md` to page URLs; this page is available as [Markdown](https://docs.imerit.net/labeling/labeling-tools/tools/rotated-bounding-box.md).
# Rotated Bounding Box
Overview of the Rotated Bounding Box labeling tool in Ango Hub
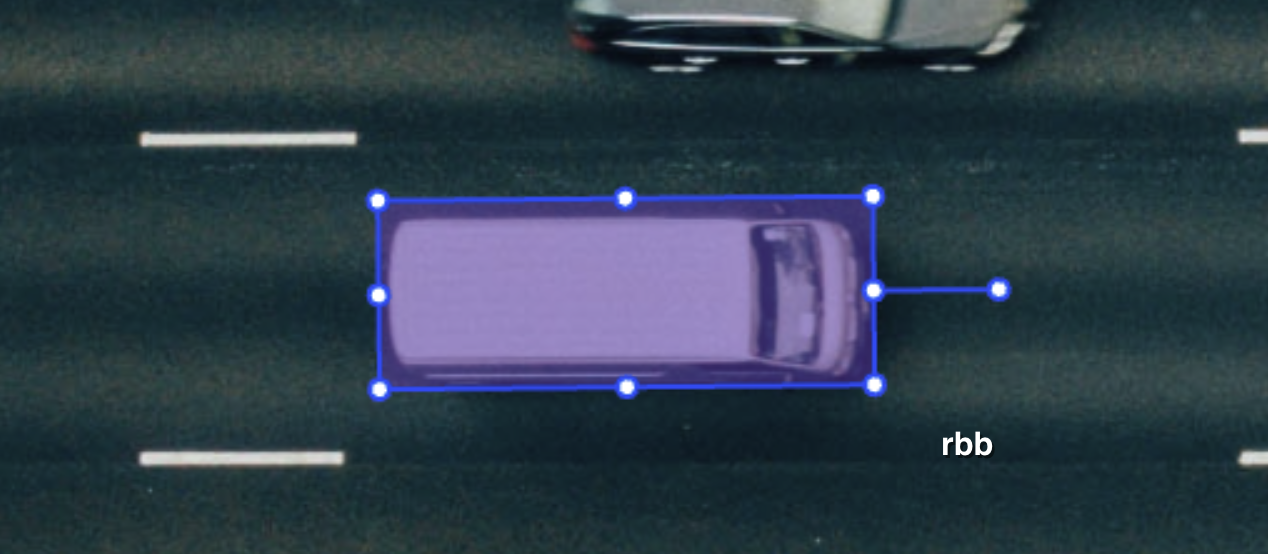
The rotated bounding box labeling tool allows you to draw a box around an object or point of interest and rotate it.
{% hint style="info" %}
The Rotated Bounding Box tool is supported across the Image, Video, and Medical labeling editors. In the Medical editor, it is available for NRRD assets in the standard Axial, Coronal, and Sagittal views.
{% endhint %}

## The Rotated Bounding Box Tool in Ango Hub
### How to add a Rotated Bounding Box tool to your project
From the project’s *Settings* tab, enter the *Category Schema* section.
Click on *Add Category*. From the list that appears, click on *Rotated Bounding Box*.
A new row will appear named *Rotated Bounding Box*. Click on it to expand it.
Give your rotated bounding box tool a title.
**Required:** Enable the *Required* toggle if you want to force labelers to create a rotated bounding box for each asset. When the toggle is disabled, labelers will be able to save and move to the next asset without creating the rotated bounding box.
**Targeted OCR**: By enabling this, you will be able to perform OCR and get the OCR results in the exports for the areas highlighted by the bounding boxes belonging to this class.
If you would like to ask labelers further questions, for example, if you want to show a further *radio* after drawing the rotated bounding box, click on *Add Classification* and add a further question. [More on nested questions here](/labeling/labeling-tools/tools/nested-classifications.md).
### How to Draw a Rotated Bounding Box
Click on the image where you'd like the top-left corner of the rotated bounding box to be. Click again where you'd like the box to end.

The line and point outside the box indicate the direction of the rotated bounding box. When the *Show Rotated Bounding Box Rotation Handles* editor setting is enabled, they remain visible after you deselect the object, making it easier to see the box's orientation at a glance.
You can change the angle of the box by selecting it, then clicking and dragging on the point located just outside the box. When the object is not selected, visible direction handles are read-only and cannot be used to rotate the box. Turn off *Show Rotated Bounding Box Rotation Handles* if you do not want unselected rotated bounding boxes to show the direction handle and line.
## Rotated Bounding Boxes in the Medical Labeling Editor
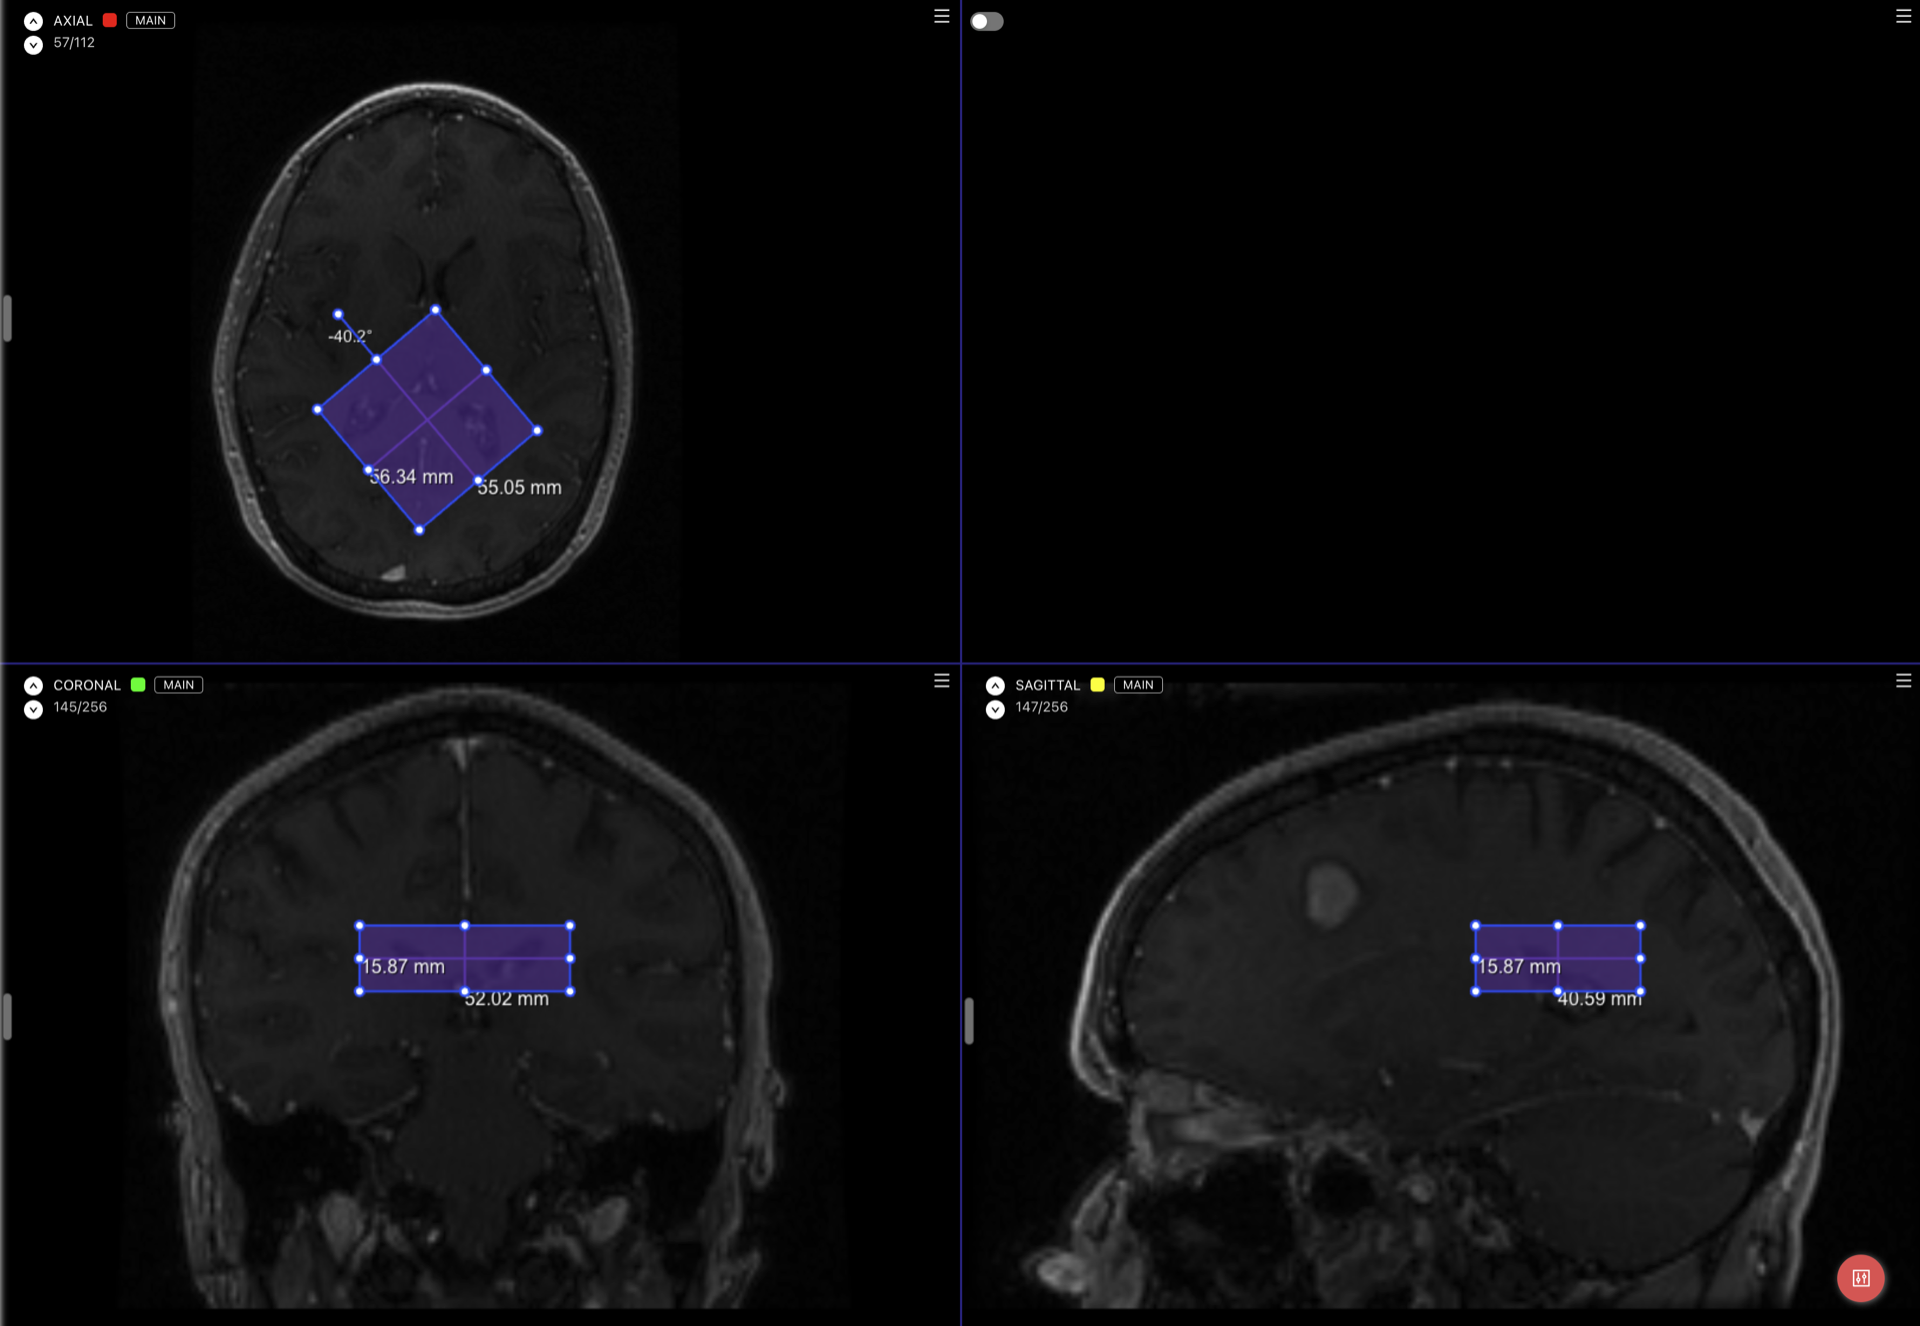
In an NRRD task, select a Rotated Bounding Box class and draw the box in the Axial, Coronal, or Sagittal view. Before rotating the box, resize it from one of the other standard views to set its depth. You can then move, resize, or rotate it from any of the three standard views. Select the box and drag the round knob above it to rotate it; drag a corner or side handle to resize it, or drag inside it to move it.
The labels next to the box show its physical dimensions, based on the medical volume's real-world spacing. Its rotation is also shown next to the knob. Each view shows the box's intersection with the current slice, so a tilted box may appear as a shape with three to six corners, or as a thin line when seen from the side. Changes to the box are reflected in the other standard views and persist when you save and reopen the task.
Press V to extend the selected box to the current slice. This has no effect when the box is tilted too steeply relative to that view. Edits that would put the box outside the volume are rejected.
Selecting a rotated bounding box from the Objects list navigates the Axial, Coronal, and Sagittal views to the box. Selecting it directly in a view leaves the current slices unchanged.
The 3D Viewer displays rotated bounding boxes with their edges and center lines. Refresh the 3D Viewer after editing a box to see the latest geometry.
To add pre-existing rotated bounding boxes while importing NRRD assets, see [How to Import Rotated Bounding Boxes into NRRD Assets](/data/importing-and-exporting-annotations/importing-annotations/importing-nrrd-annotations.md#how-to-import-rotated-bounding-boxes-into-nrrd-assets).
{% hint style="warning" %}
Rotated bounding boxes are not displayed or editable in reformatted views.
{% endhint %}
## Perform OCR on the contents of the bounding box
Hub allows you to perform OCR on the contents of rotated bounding boxes, both single and in bulk.
To do so, when adding your rotated bounding box class to your project, enable the *Targeted OCR* toggle as mentioned in the previous section.
{% hint style="warning" %}
Targeted OCR will only work if the rotation handle is at the **top**.
{% endhint %}
### On a Single Rotated Bounding Box
Once you are in the labeling editor, draw a bounding box over the text you'd like to perform OCR on. Then, right-click on the box and expand the context menu.
Click on thebutton to perform OCR on the area highlighted by the box. The OCR results will appear in the context menu, together with how confident our OCR module is about the OCR results:
### On Multiple Rotated Bounding Boxes
In the labeling editor, press *Shift* and click on the rotated bounding boxes you'd like to perform OCR on. Once you have selected all boxes, right click on any one of them and click on *Run OCR*.
To see the OCR results, right-click on a box and expand the context menu that appears. Alternatively, expand the rows in the *Objects* section in the lower-left corner of the UI.
---
# Agent Instructions
This documentation is published with GitBook. GitBook is the documentation platform designed so that both humans and AI agents can read, navigate, and reason over technical content effectively. Learn more at gitbook.com.
## Querying This Documentation
If you need additional information that is not directly available in this page, you can query the documentation by asking a question.
Perform an HTTP GET request on the following URL with the `ask` and `goal` query parameters:
```
GET https://docs.imerit.net/labeling/labeling-tools/tools/rotated-bounding-box.md?ask=&goal=
```
`ask` is the immediate question: it should be specific, self-contained, and written in natural language.
`goal` is what the user is ultimately trying to achieve, the reason they need the answer. Sharing it helps GitBook give you a better, more relevant answer. A goal is most helpful when it describes the outcome the user wants rather than restating the question. For example, with `ask=how do I create an API token`, a goal like `automate deployments from our CI pipeline` lets GitBook tailor the answer to that use case.
The response will contain a direct answer to the question and relevant excerpts and sources from the documentation.
Use this mechanism when the answer is not explicitly present in the current page, you need clarification or additional context, or you want to retrieve related documentation sections.