> For the complete documentation index, see [llms.txt](https://docs.imerit.net/llms.txt). Markdown versions of documentation pages are available by appending `.md` to page URLs; this page is available as [Markdown](https://docs.imerit.net/labeling/labeling-editor-interface/dicom-labeling-editor.md).
# DICOM Labeling Editor
Overview of the DICOM Labeling Editor interface on Ango Hub
Ango Hub provides a labeling editor with which single-frame and multi-frame DICOM files can be annotated.
{% hint style="info" %}
This article will exclusively go over Ango Hub's DICOM labeling interface. Features common to all labeling editors are instead [explained here](/labeling/labeling-editor-interface.md).
{% endhint %}
## Overview
### Supported File Types
The DICOM labeling editor supports DICOM assets with the following file extensions:
* .dcm
Both grayscale and color DICOM images are supported.
### Supported Labeling Tools
The DICOM labeling editor supports following labeling tools:
**Tools**
* Bounding Box
* Polygon
* Polyline
* Point
* Voxel Brush
* Angle
**Classifications**
* Radio
* Checkbox
* Single-Select Dropdown
* Multi-Select Dropdown
* Single-Select Tree
* Multi-Select Tree
* Text
**Relations**
* Single Relation
* Group Relation
### DICOM Interface Elements
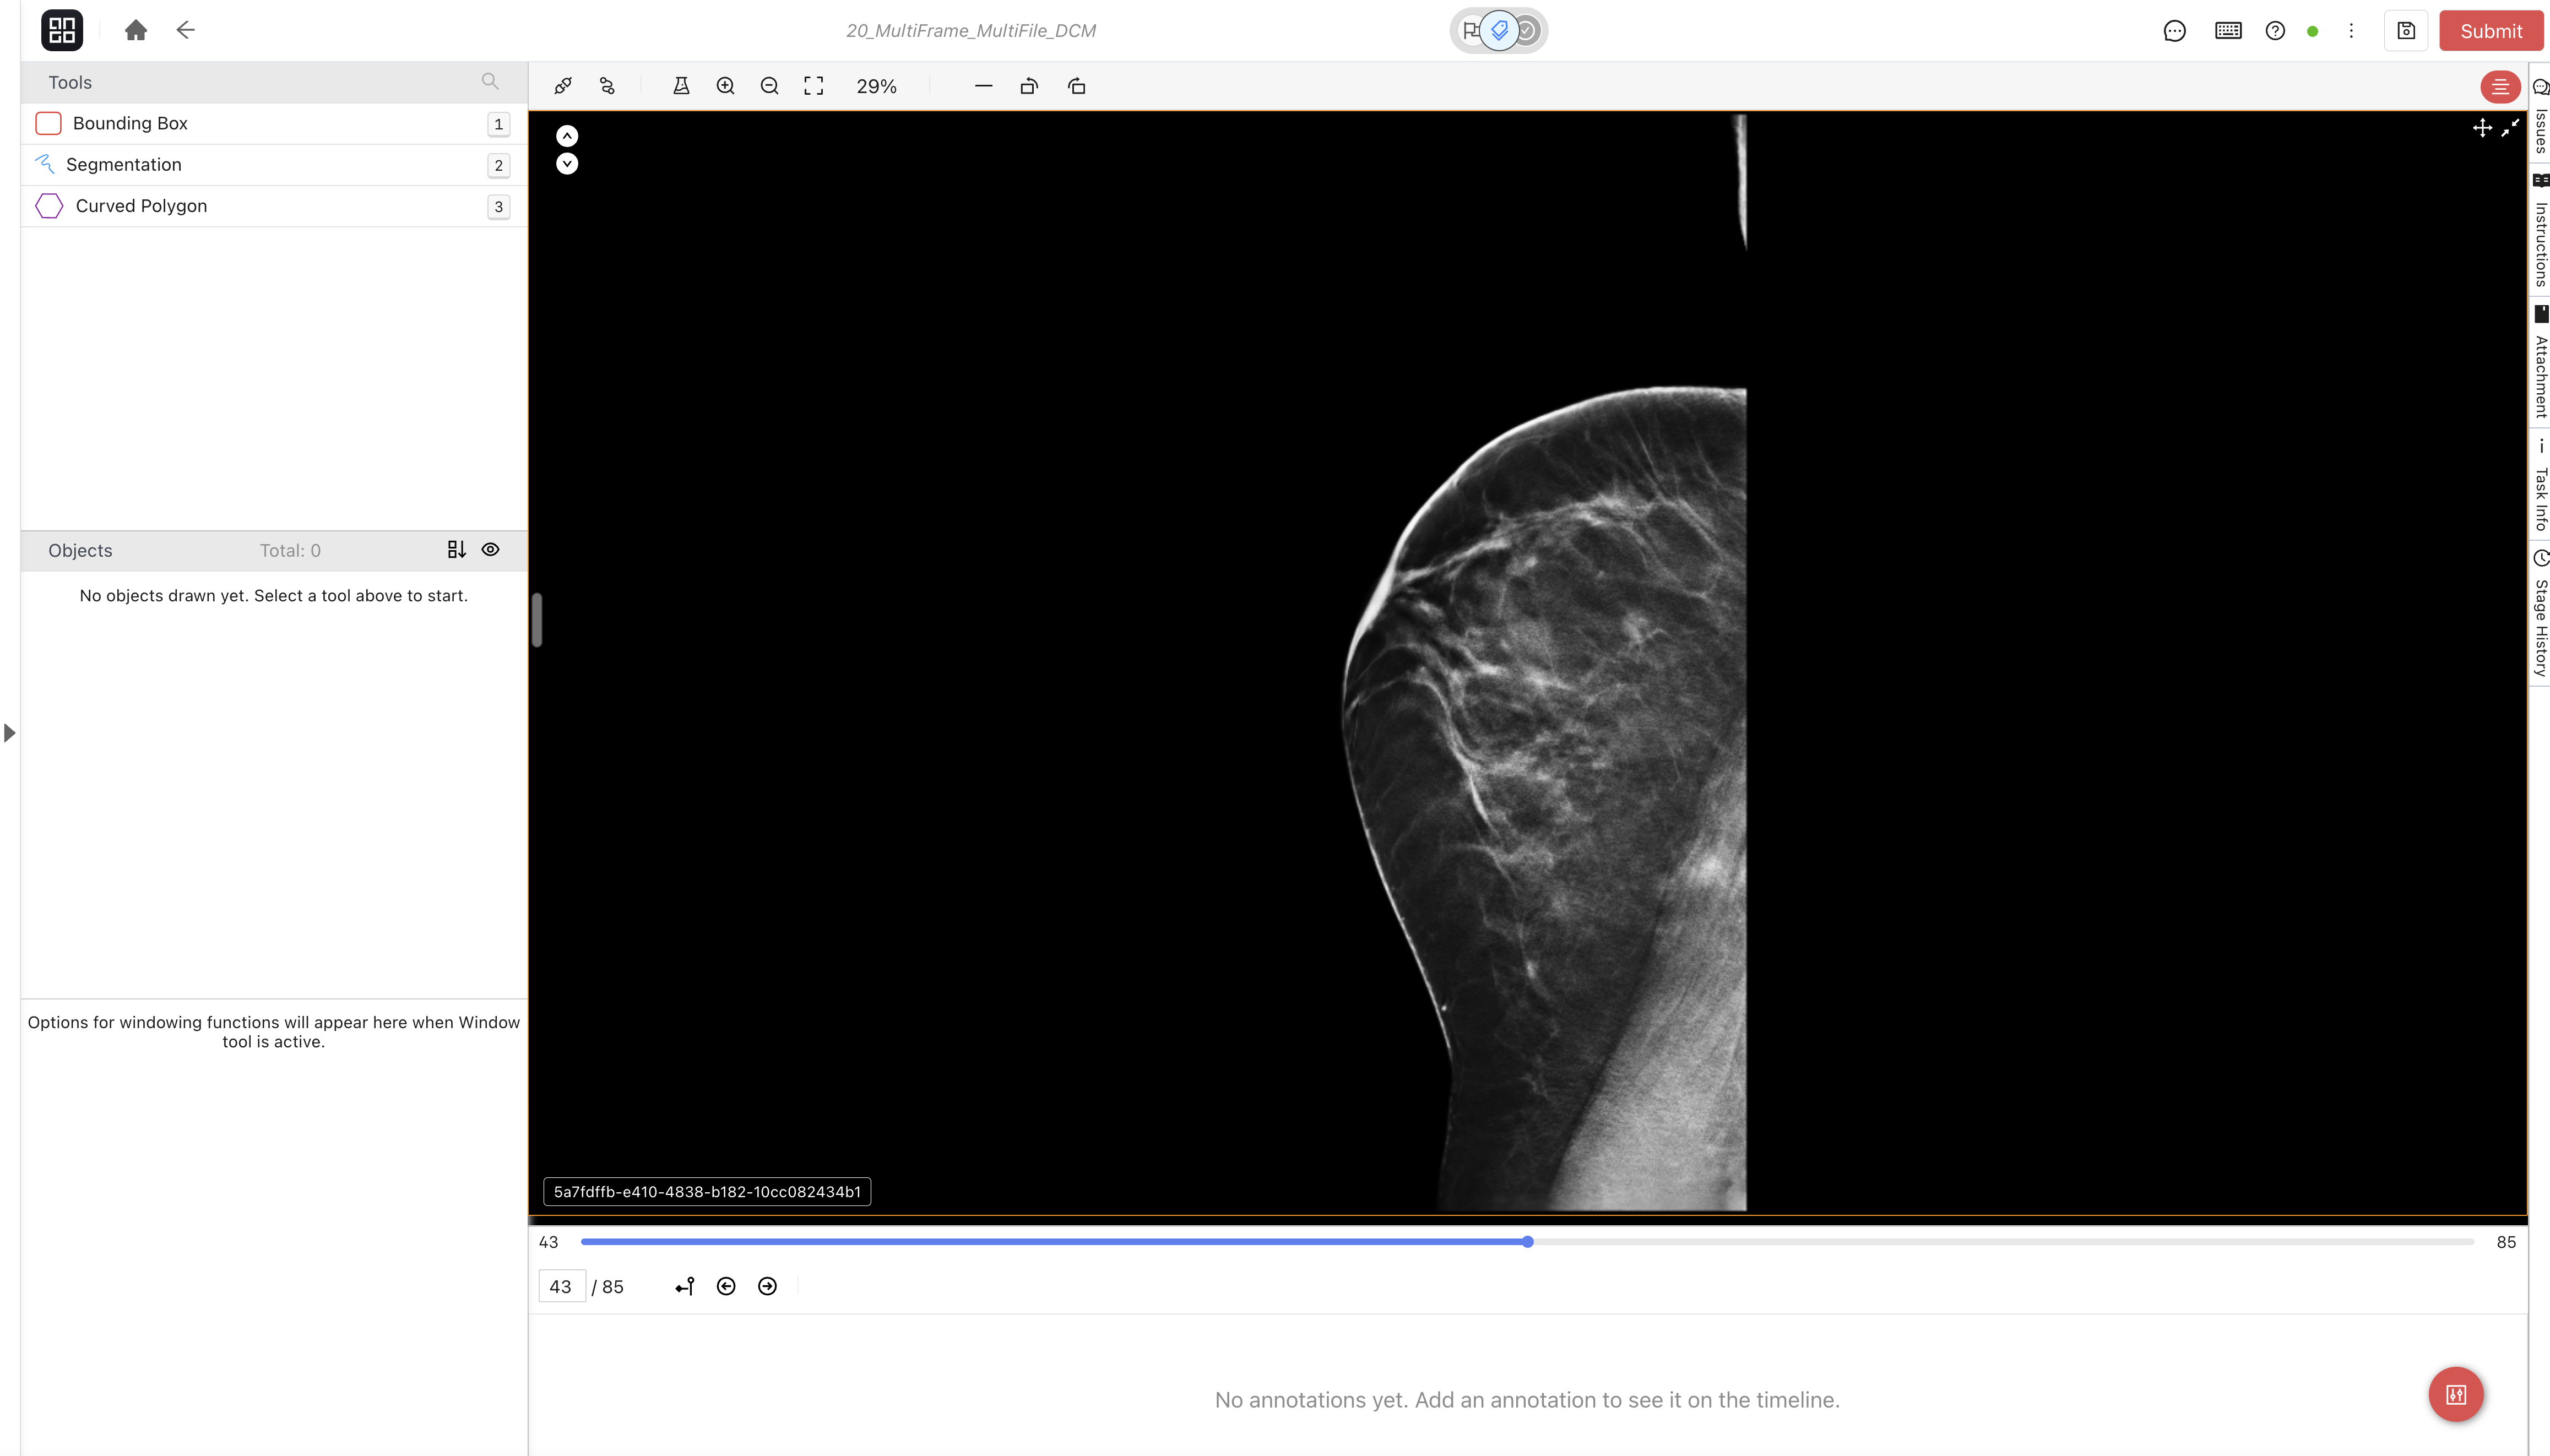
When you open a DICOM asset, Ango Hub displays the DICOM file in a DICOM-specific image editor. Single-frame DICOM files behave like image assets. Multi-frame DICOM files also include frame navigation controls.
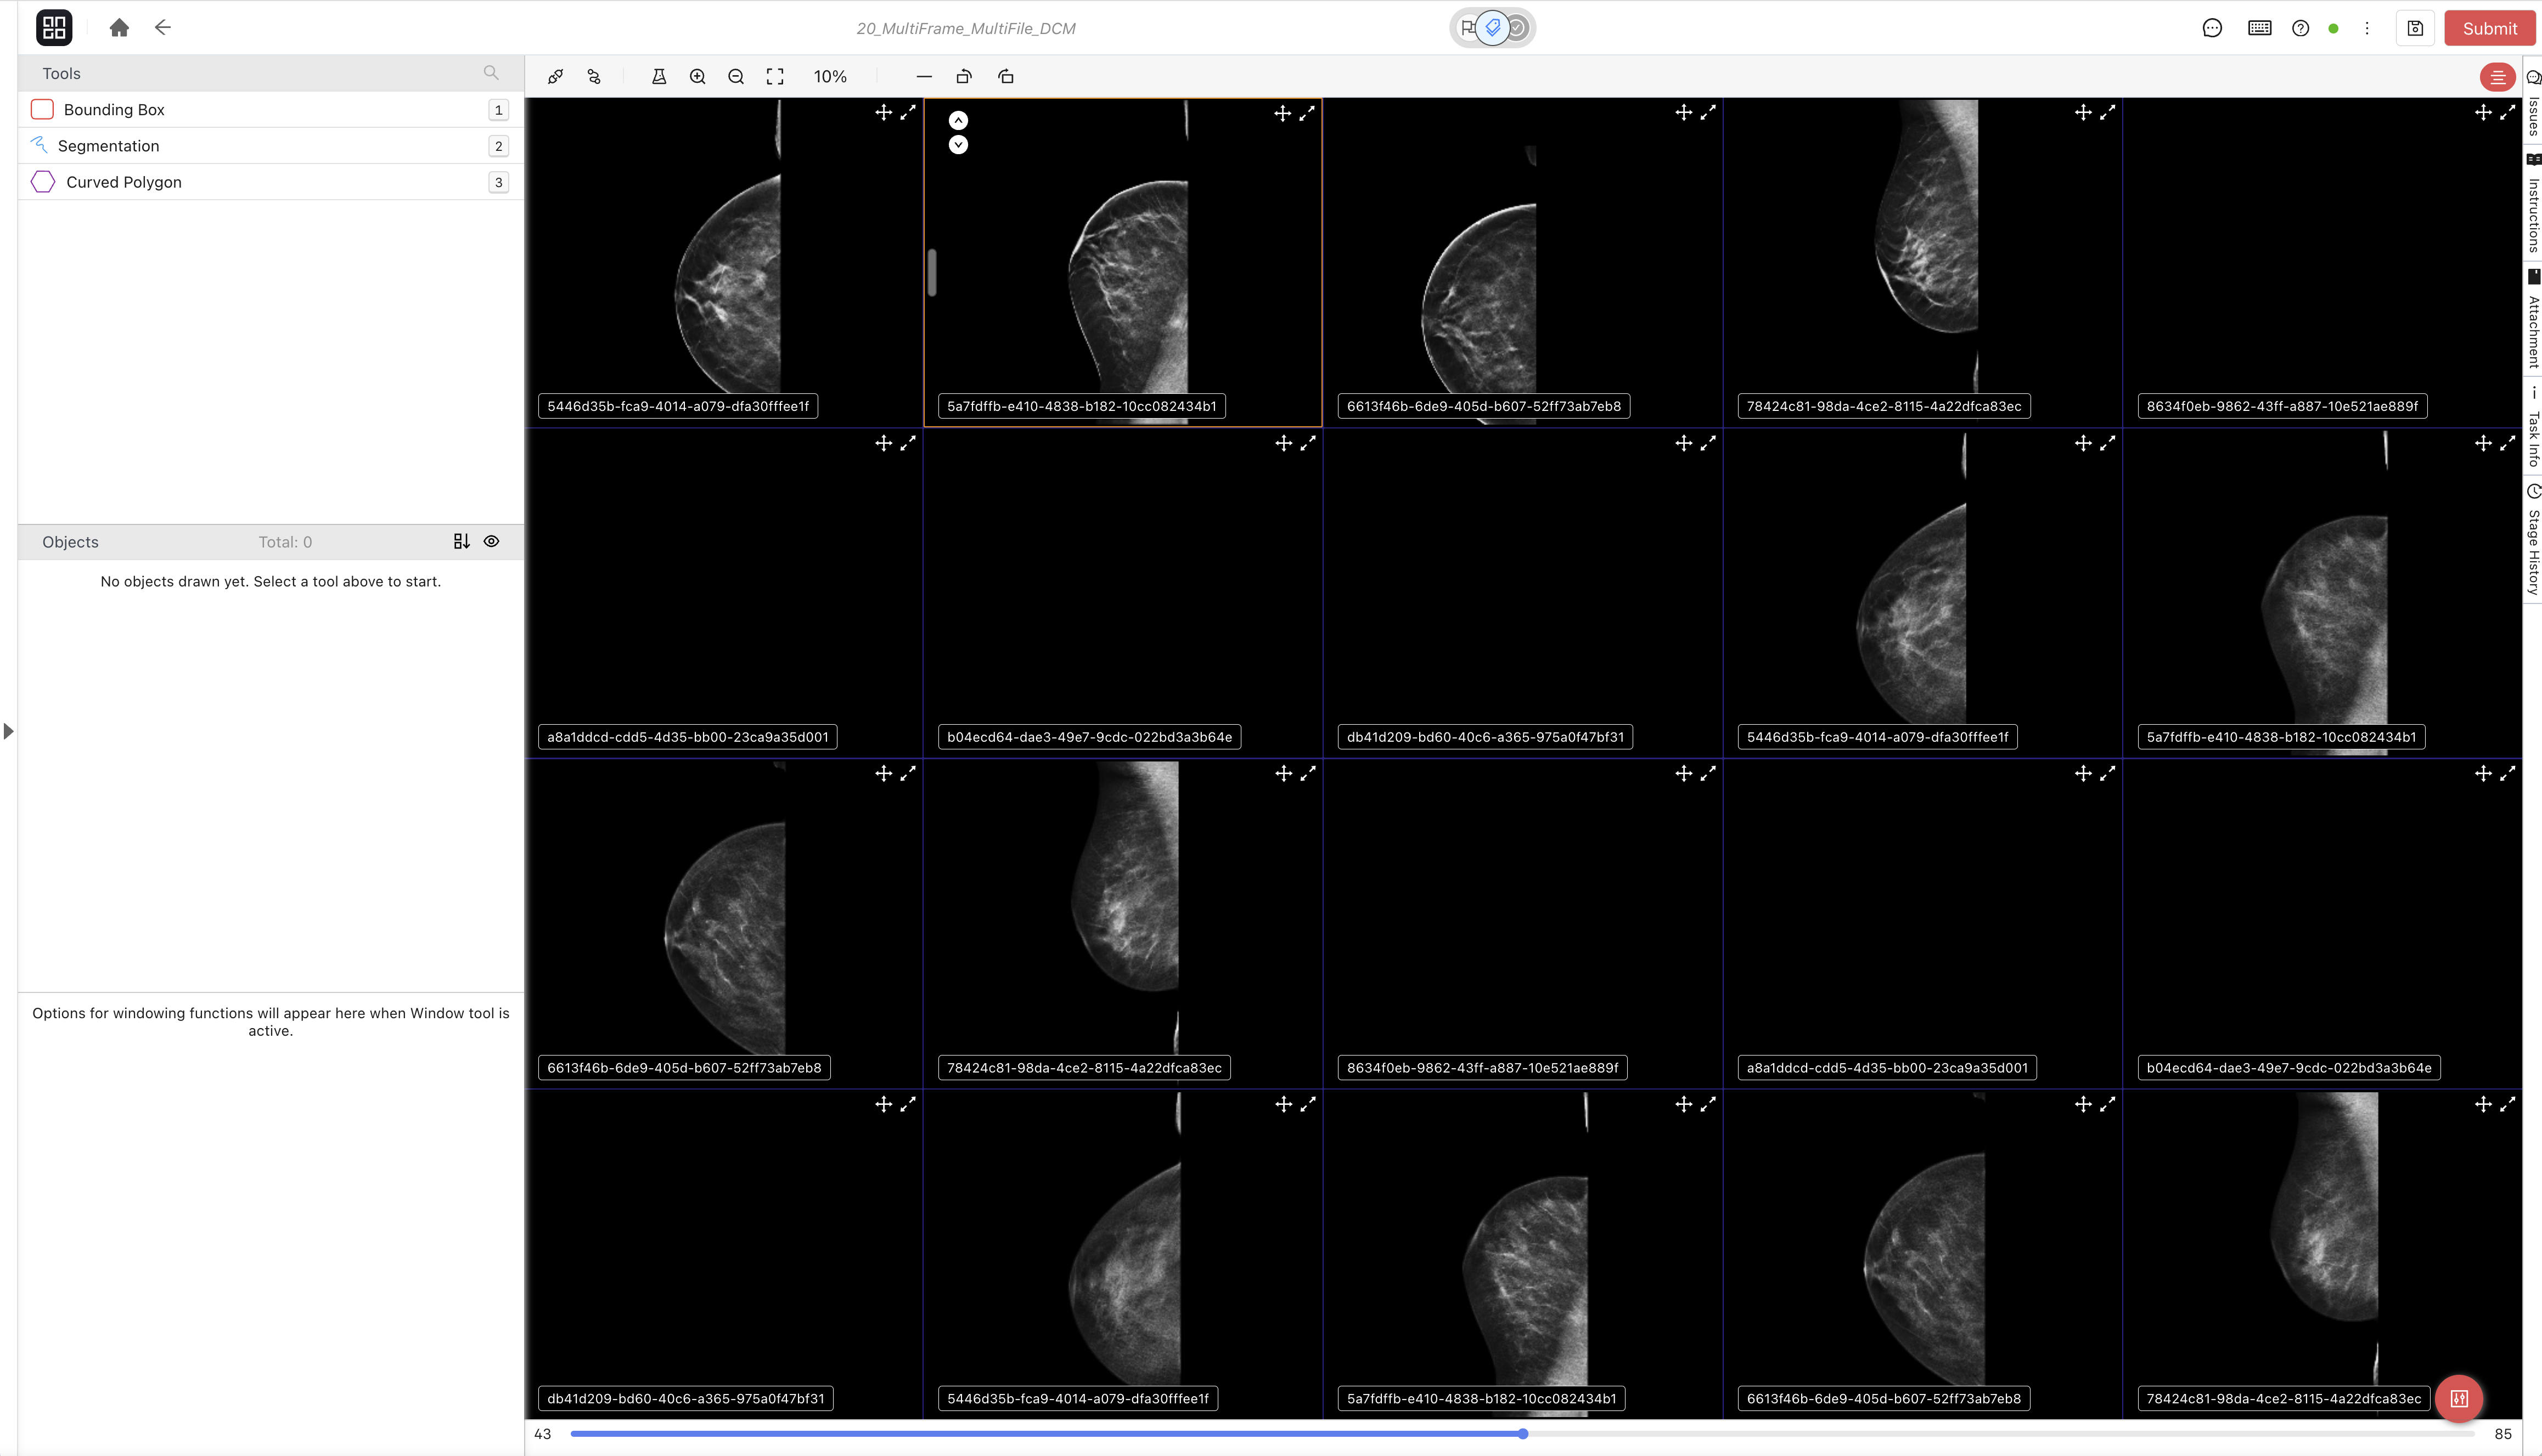
If the asset contains multiple DICOM files, Ango Hub displays them in a multi-view grid.
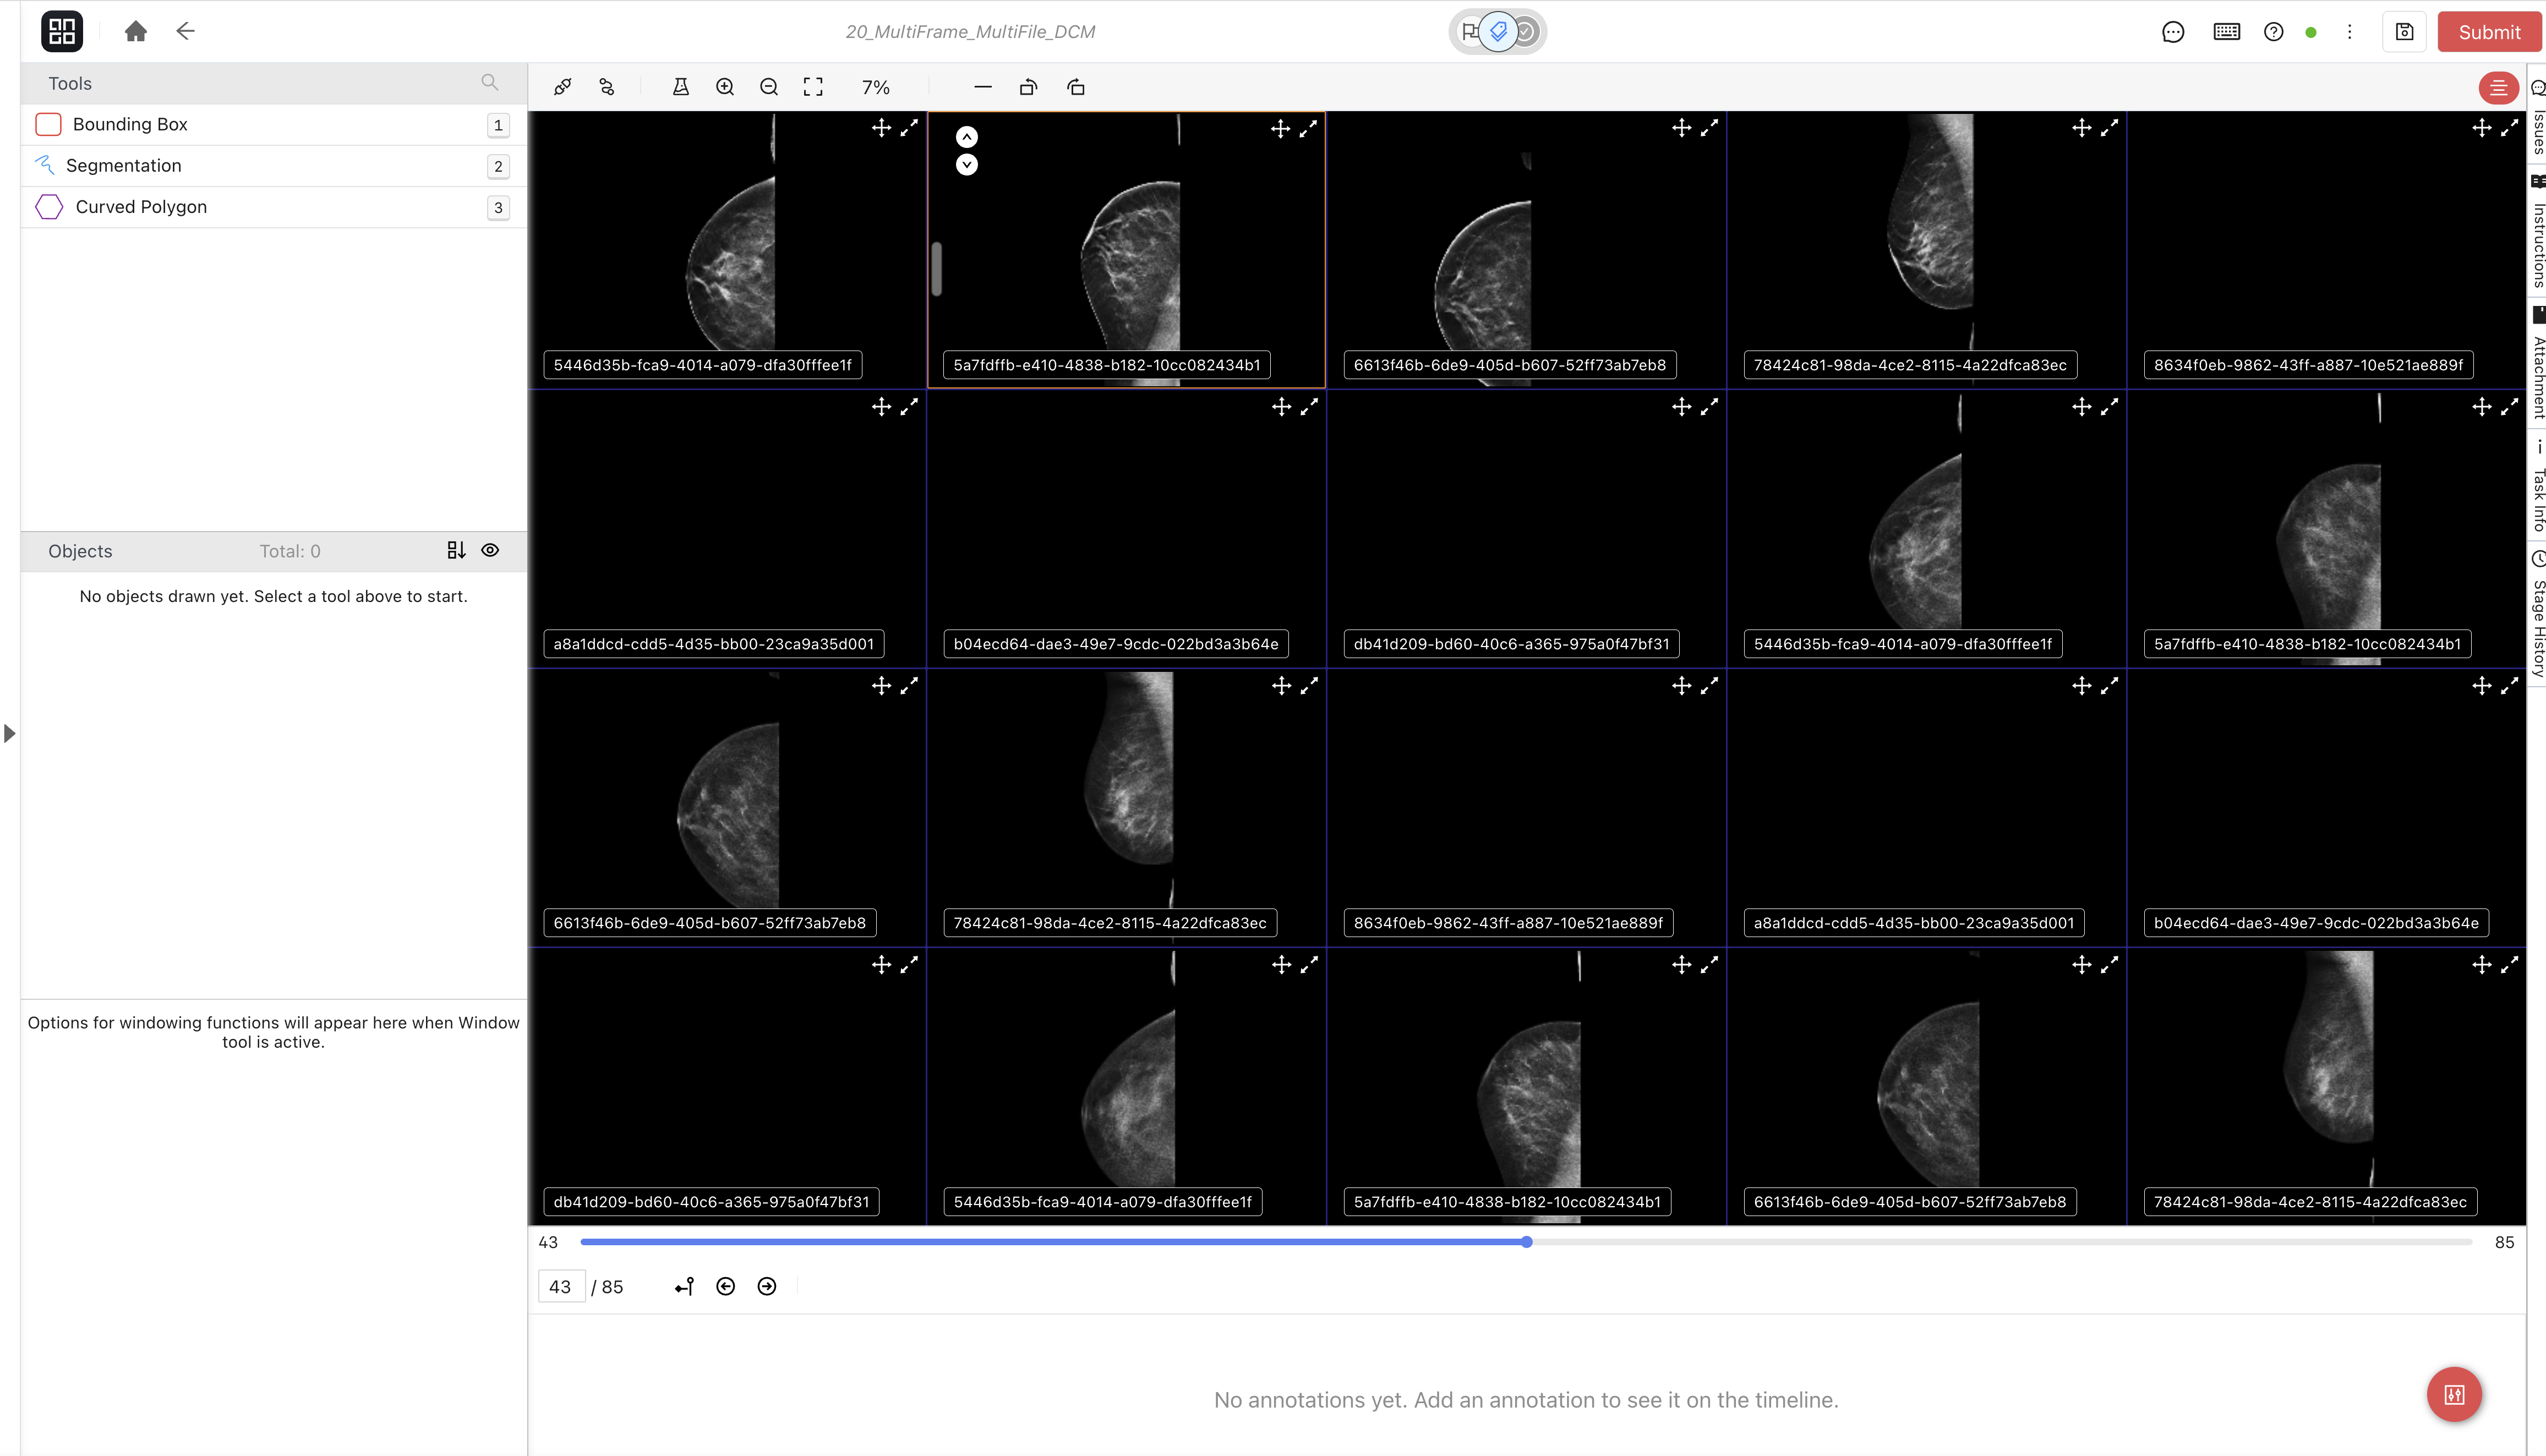
#### Multi-frame Navigation
For multi-frame DICOM files, use the playback bar at the bottom of the editor to move through frames. You can move one frame at a time, drag the playhead, play through the frames, or enter a frame number.
When multiple DICOM files are displayed at once, frame navigation applies to the active DICOM view. Click a DICOM view to make it active before navigating its frames.
If the active DICOM has more than one frame, a vertical slice navigator is also shown on the left side of that view. Use the slider or the up and down arrows to move through the DICOM's frames.
You may also use the left and right arrow shortcuts to move backward and forward through frames in the active DICOM.
#### Multi-view Grid
In multi-DICOM assets, each DICOM file appears in its own view. The active view is highlighted. Click a view to make it active, or hover over a view while a tool is selected to annotate in that view.
You can rearrange views by dragging them with the handle in the top-left corner of each view. You can also enlarge a single view with the expand button in the top-right corner of that view, then restore the full grid.
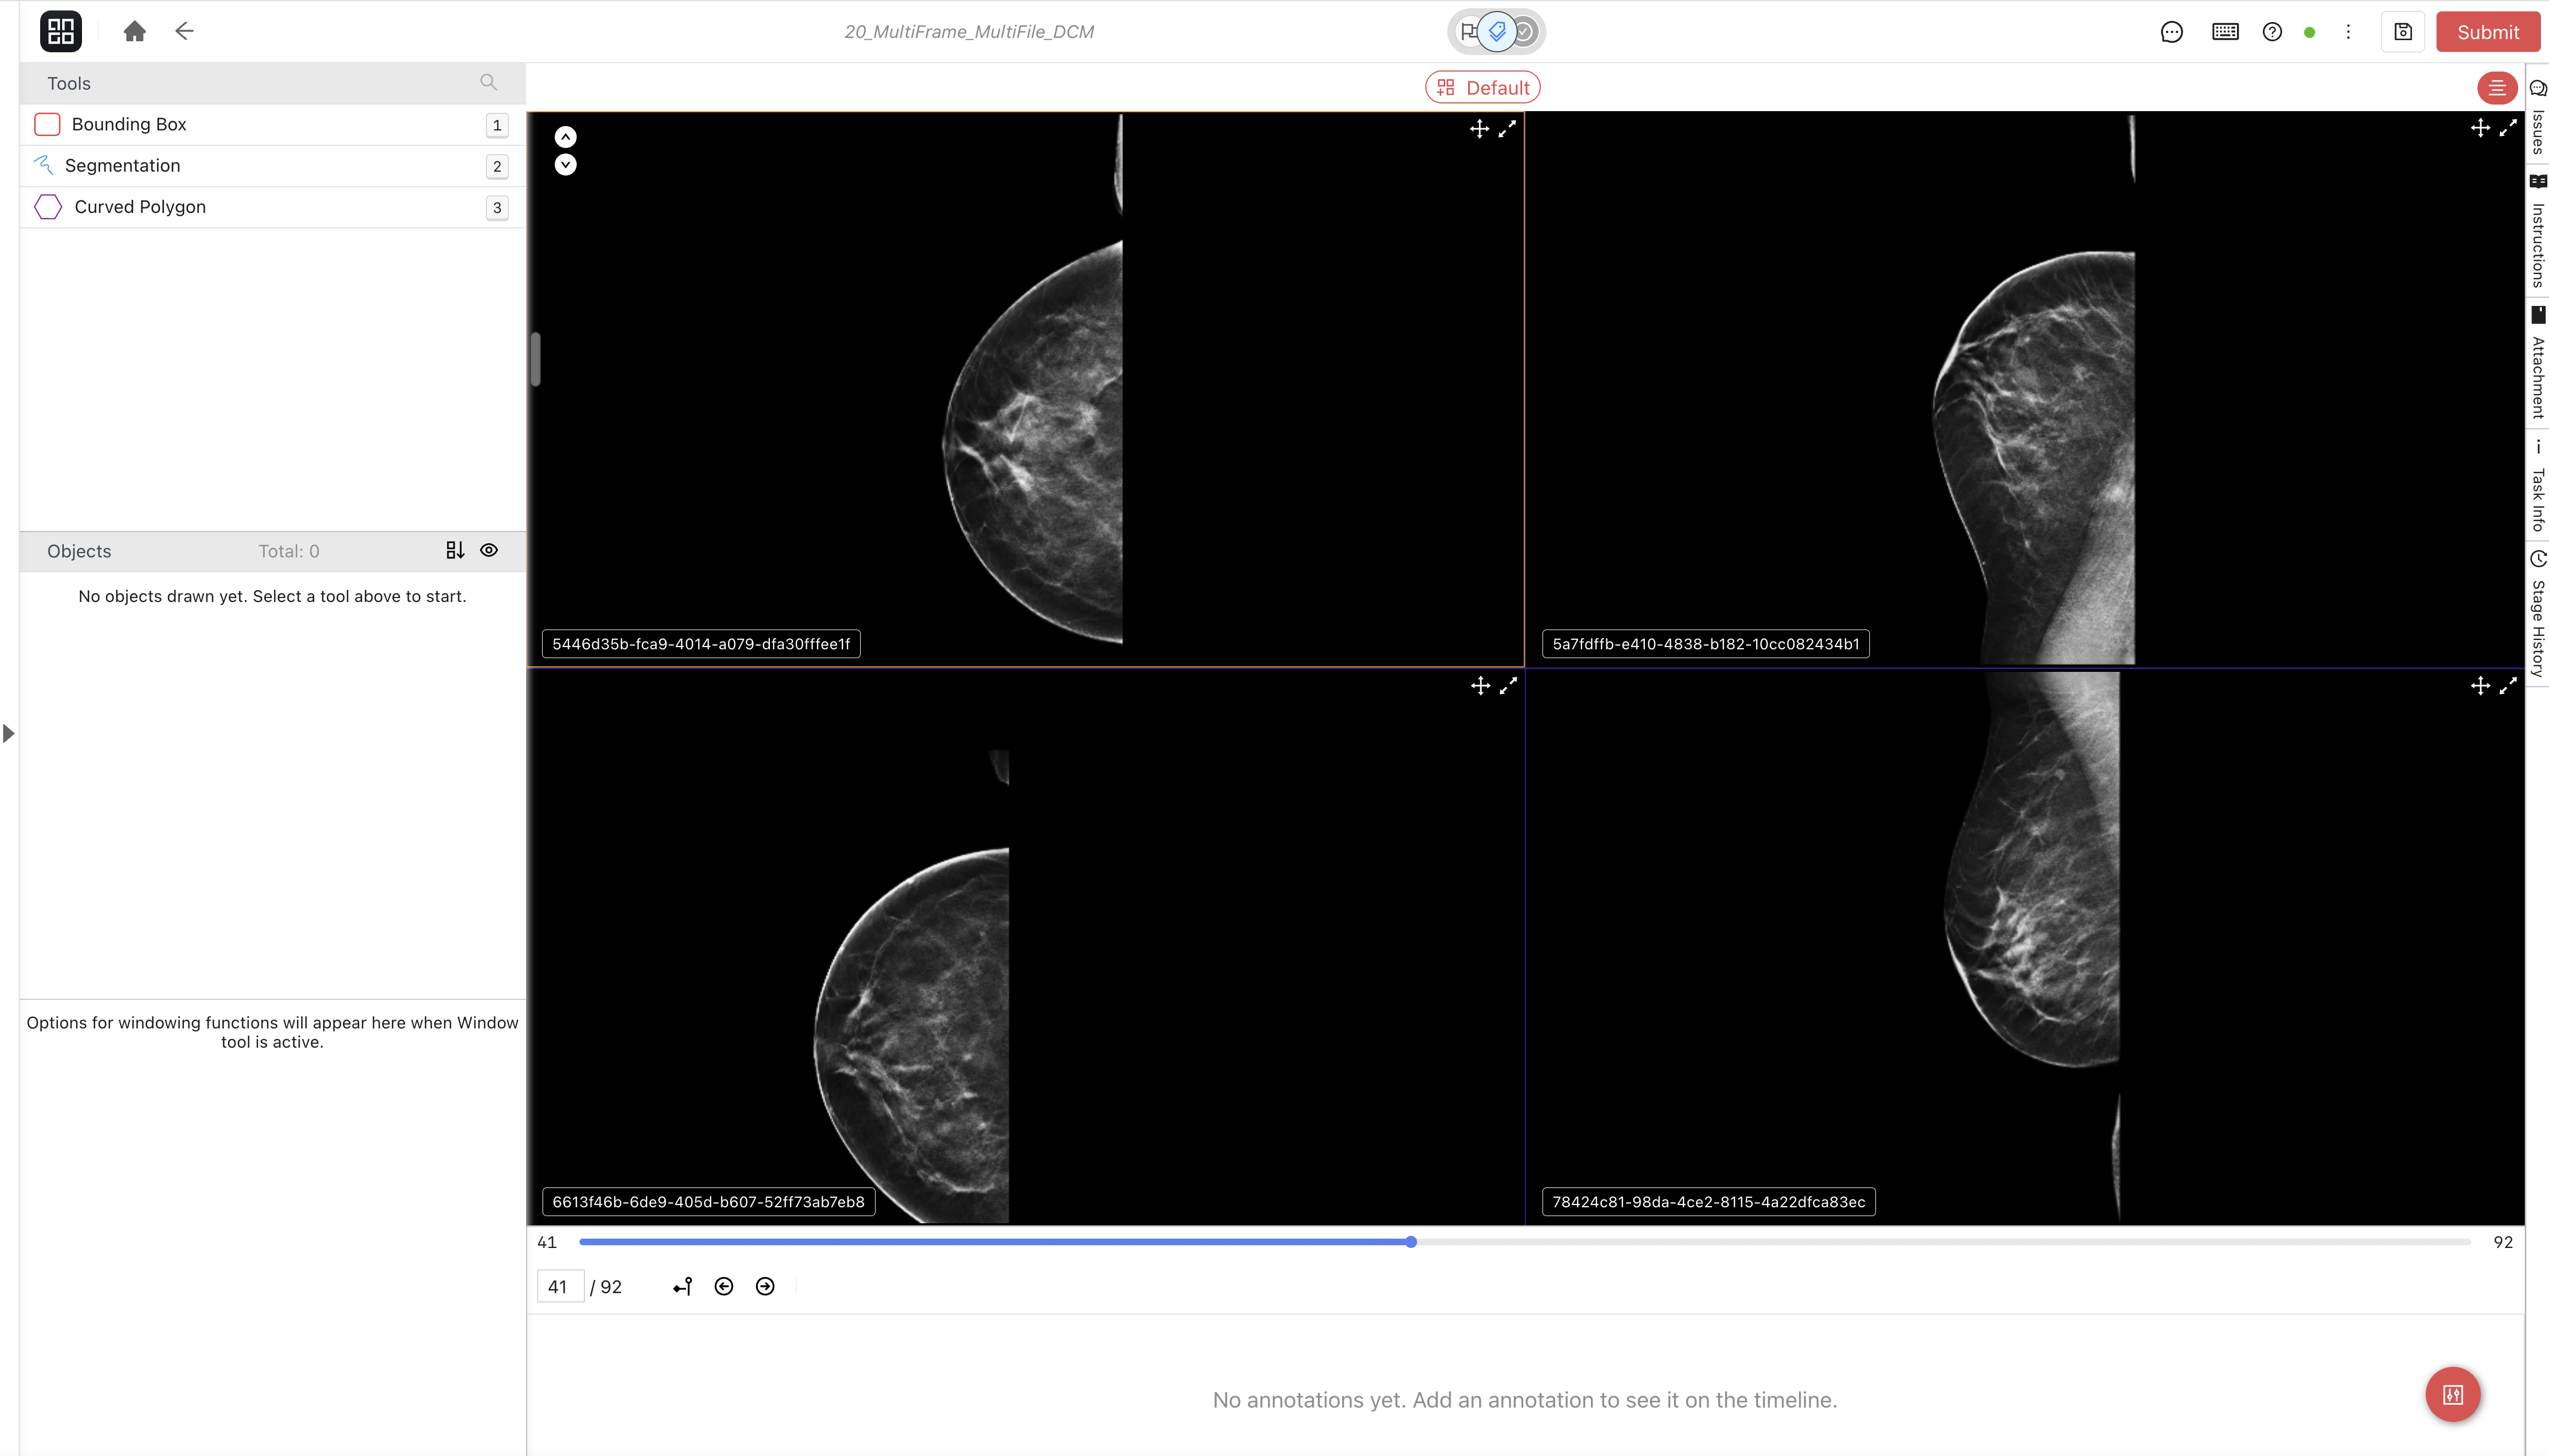
While holding Alt (Option) on your keyboard, click DICOM views to select a smaller set of views. When the selected count matches an available layout, a layout button appears. Click it to show only the selected DICOMs in a compact layout. Click *Default* to return to the full grid.
The alignment button at the top of the grid lets you align the displayed DICOM views.
#### DICOM Filenames
By default, the filename of each DICOM is displayed on the bottom-left of each view. You can turn this off from the editor's settings menu by toggling off *Show DICOM Filename*.
### How to Annotate DICOM Files
Annotating DICOMs is similar to annotating images. For multi-frame DICOMs, annotations are created on the current frame of the active DICOM.
The following are the labeling tools supported on DICOMs:
* [Bounding Box](/labeling/labeling-tools/tools/bounding-box.md)
* [Polygon](/labeling/labeling-tools/tools/polygon.md)
* [Polyline](/labeling/labeling-tools/tools/polyline.md)
* [Point](/labeling/labeling-tools/tools/point.md)
* [Voxel Brush](/labeling/labeling-tools/tools/voxel-brush.md)
* [Angle](/labeling/labeling-tools/tools/angle.md)
From the *Tools* panel on the left sidebar, select a supported labeling tool. Then, follow the instructions found on each tool's docs page, linked to above.
If no tools are present in the project, only answer the questions in the *Classifications* panel.
When done, move forward to the next frame or DICOM and repeat the process until all required frames and DICOMs are labeled.
#### Nested Questions and Classifications
If the labels have nested questions, right-click on each label and click on the menu item that appears to see and answer the nested questions.
If classification questions are present, you may answer them from the *Questions* panel on the left sidebar.
## Annotating Multiple DICOM Files at Once
{% hint style="info" %}
For information on how to import multi-DICOM assets, please consult [this docs page](/data/importing-assets/bundled-assets/importing-multiple-dicom-files-to-be-annotated-and-displayed-at-once.md).
{% endhint %}
### Focusing the Grid
When multiple DICOM files are displayed on screen, you may choose to focus the layout on a smaller number of them.
By default, the filename of each DICOM is displayed on the bottom-left of each view. You can turn this off from the editor's settings menu by toggling off the *Show DICOM Filename* option.
While holding Alt (Option) on your keyboard, click on the DICOMs you would like to focus on. If the selected number of DICOMs matches an available compact layout, a layout button will appear.
Clicking the layout button will display the selected DICOMs in their own, larger layout.
To return to the full grid, click *Default*.
### Copying and pasting annotations from one DICOM to another
You may select a single annotation, or multiple by holding Shift, then use Control + C (⌘ + C on macOS) to copy the objects to the clipboard, even if the objects are on different slices in the same DICOM. You may then paste the new objects to the other DICOM by clicking on the target DICOM and pressing Control + V (⌘ + V on macOS).
Due to a current limitation, all objects in the clipboard will be pasted on the slice (frame) you are currently viewing, regardless of whether they came from different frames.
## Changing Window Levels
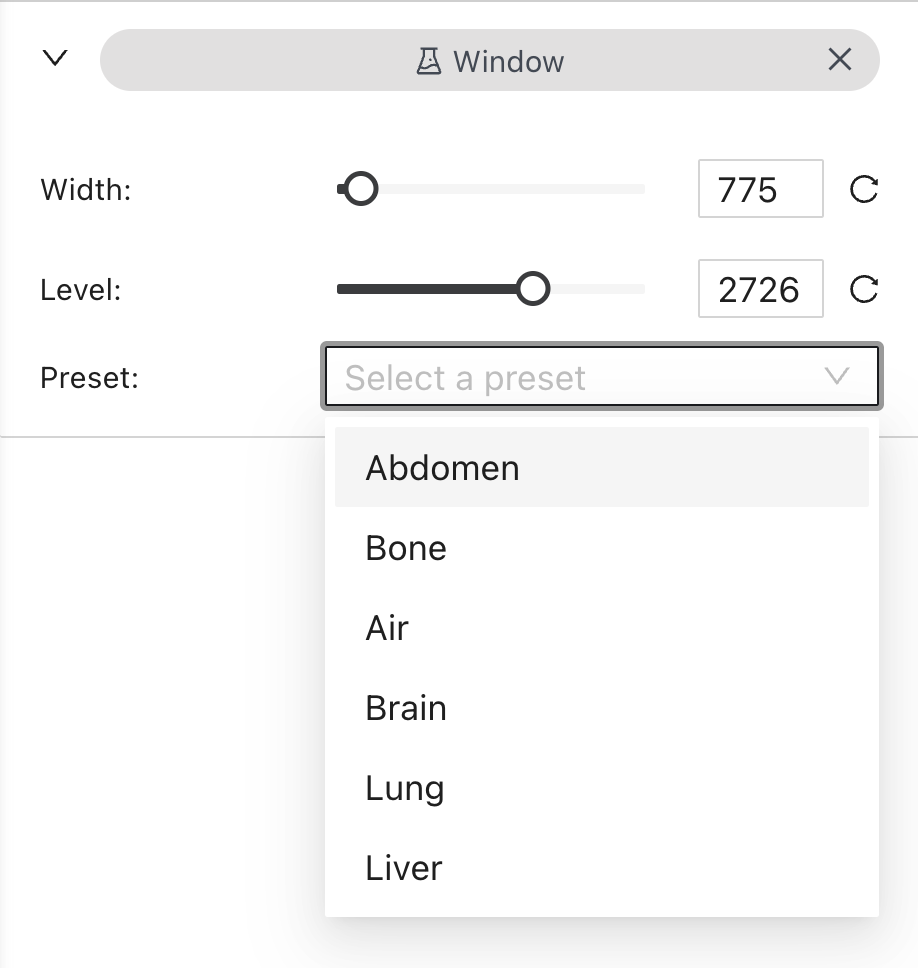
Click the *Window* tool in the toolbar to open windowing options for the active DICOM.
You can adjust the window width and level using the sliders or by entering values. You can also choose from presets such as *Abdomen*, *Bone*, *Air*, *Brain*, *Lung*, and *Liver*, or reset width and level to the DICOM's default values.
The *Preset* dropdown follows the current width and level. When both values match a built-in or custom preset, its name appears in the dropdown. If you change either value so they no longer match a preset, the dropdown shows *Select a preset*. This also applies when you adjust the values with the sliders or by dragging on the DICOM view.
You can apply a preset to the active DICOM with its keyboard shortcut, even when the Window options are closed:
| Preset | Shortcut | Width | Level |
| ------- | ----------- | ----: | ----: |
| Abdomen | `Shift + 1` | 350 | 40 |
| Bone | `Shift + 2` | 1000 | 400 |
| Air | `Shift + 3` | 1000 | -426 |
| Brain | `Shift + 4` | 100 | 50 |
| Lung | `Shift + 5` | 1400 | -500 |
| Liver | `Shift + 6` | 150 | 30 |
To save your current width and level as a custom preset, click the save icon next to *Preset* and enter a name. You can save up to two custom presets, which are assigned `Shift + 7` and `Shift + 8`. Custom presets are stored for the current project in your browser and are available in both 2D DICOM and NRRD tasks in that project. Delete a custom preset from the dropdown to replace it. The save icon is hidden when the current width and level match an existing preset.
Long custom preset names are shortened in the dropdown. Hover over a preset to see its full name.
Preset shortcuts do not activate while you are typing in an input field.
Alternatively, right-click and drag on the DICOM view to change the window width and level directly.
### Smoothing DICOM Images
The *Window* tool also provides two ways to smooth the active DICOM image:
* **Despeckle** reduces isolated pixels that differ sharply from the pixels around them.
* **Block Averaging** smooths groups of neighboring pixels.
Turn on either option, then adjust its *Strength* slider or enter a value. The image updates when you release the slider. Higher values apply stronger smoothing, and you can use both options at the same time.
These smoothing options are available for DICOM images, including color DICOM images. They are not available for NRRD assets.
### Keyboard Shortcuts
A full list of keyboard shortcuts is available by clicking on the *Keyboard* button on the right side of the top bar:

### Further reading
{% content-ref url="/pages/-MjiniaaX8Bc-1CsxFDT" %}
[Audio Labeling Editor](/labeling/labeling-editor-interface/audio-labeling-editor.md)
{% endcontent-ref %}
{% content-ref url="/pages/-Mjifco2debe91gXbTS1" %}
[Labeling Editor Interface](/labeling/labeling-editor-interface.md)
{% endcontent-ref %}
---
# Agent Instructions
This documentation is published with GitBook. GitBook is the documentation platform designed so that both humans and AI agents can read, navigate, and reason over technical content effectively. Learn more at gitbook.com.
## Querying This Documentation
If you need additional information that is not directly available in this page, you can query the documentation by asking a question.
Perform an HTTP GET request on the following URL with the `ask` and `goal` query parameters:
```
GET https://docs.imerit.net/labeling/labeling-editor-interface/dicom-labeling-editor.md?ask=&goal=
```
`ask` is the immediate question: it should be specific, self-contained, and written in natural language.
`goal` is what the user is ultimately trying to achieve, the reason they need the answer. Sharing it helps GitBook give you a better, more relevant answer. A goal is most helpful when it describes the outcome the user wants rather than restating the question. For example, with `ask=how do I create an API token`, a goal like `automate deployments from our CI pipeline` lets GitBook tailor the answer to that use case.
The response will contain a direct answer to the question and relevant excerpts and sources from the documentation.
Use this mechanism when the answer is not explicitly present in the current page, you need clarification or additional context, or you want to retrieve related documentation sections.