> For the complete documentation index, see [llms.txt](https://docs.imerit.net/llms.txt). Markdown versions of documentation pages are available by appending `.md` to page URLs; this page is available as [Markdown](https://docs.imerit.net/data/storages/set-up-a-storage-integration-with-azure.md).
# Set up a storage integration with Azure
You can create a secure integration between Ango Hub and Azure Blob Storage, allowing you to annotate assets stored in Azure without copying them into Ango Hub storage.
Read more on what storage integrations are and how they work [here](/data/storages.md).
Ango Hub supports two authentication methods for Azure Blob Storage:
* **Service Principal** uses Microsoft Entra ID and Azure role-based access control (RBAC). This is the recommended option when you do not want to share a storage account key and want to restrict Ango Hub to specific containers.
* **Account Key** uses the storage account name, region, and account key. It grants access at the storage-account level.
## Set up with a service principal
### Create the service principal
1. In the Microsoft Entra admin center, open *Entra ID* > *App registrations* and [register a new application](https://learn.microsoft.com/en-us/entra/identity-platform/quickstart-register-app). For most setups, select the single-tenant account type.
2. From the app registration's *Overview* page, take note of the **Directory (tenant) ID** and **Application (client) ID**.
3. Open *Certificates & secrets* > *Client secrets*, create a client secret, and copy its **Value**. Azure only shows the value once. Do not copy the secret ID.
### Assign Azure roles
Assign the service principal the following Azure roles:
* **Storage Blob Delegator** at the storage-account scope. Ango Hub needs this role to request the user delegation key used to create temporary SAS URLs.
* **Storage Blob Data Reader** on each container Ango Hub should read from.
* **Storage Blob Data Contributor** instead of Reader on containers where Ango Hub should also upload, replace, or delete blobs.
You can assign the data role at the storage-account scope if Ango Hub should access every container. For narrower access, [assign the role at the container scope](https://learn.microsoft.com/en-us/azure/storage/blobs/assign-azure-role-data-access).
{% hint style="info" %}
When the data role is limited to individual containers, Azure may not allow Ango Hub to list all containers. If this happens, enter the container name manually when selecting files. You can still access containers included in the service principal's role assignments.
{% endhint %}
### Add the integration to Ango Hub
1. From Ango Hub, click *Organization* in the top bar, open the *Storages* tab, and click *Add Storage*.
2. Select *Azure Blob Storage* as the provider, then click *Next*.
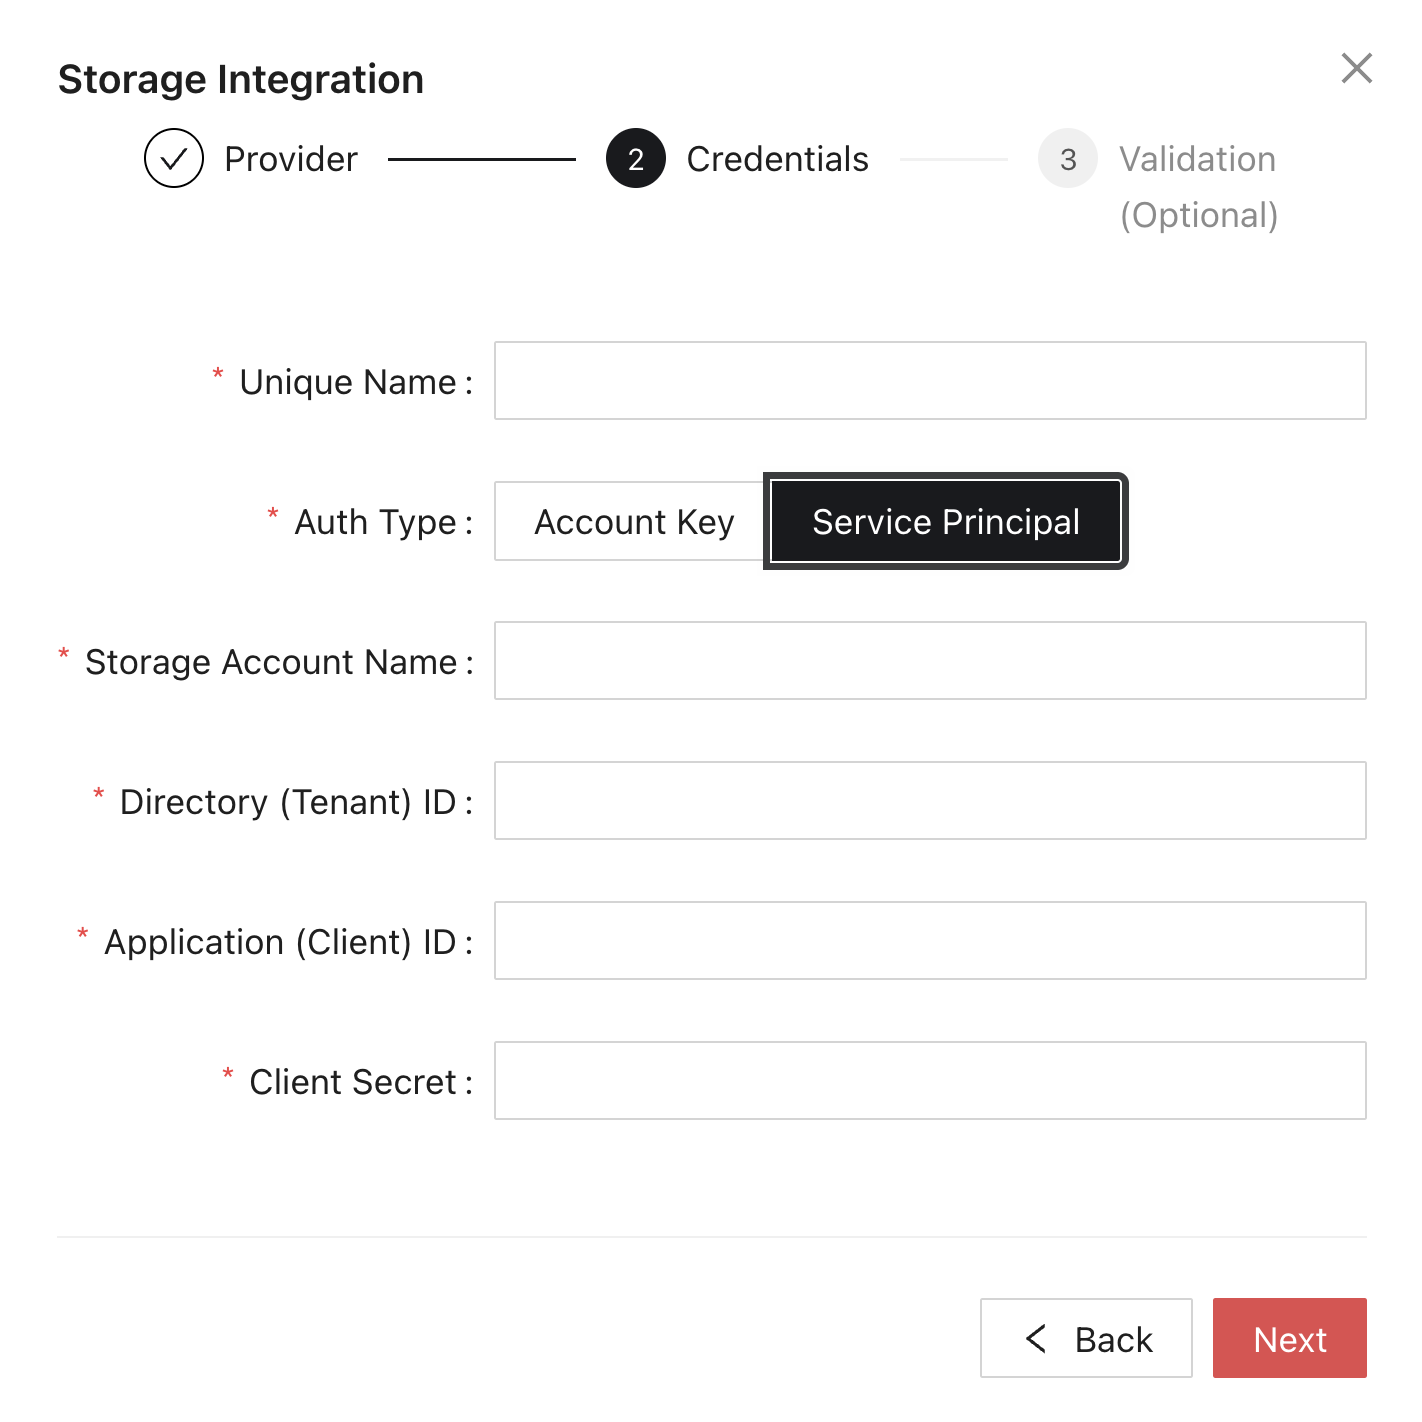
3. Select *Service Principal* under *Auth Type* and enter:
* **Unique Name**: a name of your choosing to identify the integration.
* **Storage Account Name**: the name of the Azure storage account.
* **Directory (Tenant) ID**: the tenant ID from the app registration.
* **Application (Client) ID**: the client ID from the app registration.
* **Client Secret**: the client-secret value you copied when creating it.
Select Service Principal and enter the storage account and Microsoft Entra credentials.
4. Click *Next*. Hub will show a validation step where you can test read access, write access, and CORS. You may validate the integration before creating it, or click *Create Storage* to finish.
{% hint style="warning" %}
When you edit a Service Principal integration, Ango Hub restores the storage account name, tenant ID, and client ID. The client secret remains blank for security. Enter the current secret or a new one before saving.
{% endhint %}
## Set up with an account key
1. From your Azure dashboard, click *Storage Accounts*.
2. Click the storage account you'd like to link to Hub.
3. From the column on the left, under *Security + networking*, click *Access keys*. If the keys are hidden, click *Show keys*. Then, take note of the storage account name and the *Key* under the *key1* heading. Ango Hub uses the storage account name and account key to generate temporary SAS URLs for reading and writing blobs.
{% hint style="warning" %}
If your Azure storage account has *Allow storage account key access* disabled, the Account Key method cannot validate the integration or generate SAS URLs. Either enable *Settings* > *Configuration* > *Allow storage account key access* or use the Service Principal method.
{% endhint %}
4. From the column on the left, click *Overview*. Then, take note of the *Location* string. Ango Hub requires this region value when creating an Account Key integration.
5. From Ango Hub, click *Organization* in the top bar, open the *Storages* tab, and click *Add Storage*.
Select *Azure Blob Storage* as the provider and click *Next*. Leave *Account Key* selected under *Auth Type*, then enter:
* **Unique Name**: a name of your choosing to identify the integration.
* **Account Name**: the account name you took note of in step 3.
* **Region**: the location information you took note of in step 4.
* **Account Key**: the key you took note of in step 3.
6. Click *Next*. Hub will show a validation step where you can test read access, write access, and CORS. You may validate the integration before creating it, or click *Create Storage* to finish.
{% hint style="warning" %}
When you edit an Account Key integration, the account key remains blank for security. Enter the current key or a new one before saving.
{% endhint %}
## Configure CORS and import assets
Ensure your Azure Blob service CORS policy allows Ango Hub to display assets and, if you will upload files to Azure from Hub, to write blobs. More information on setting up CORS can be found [here](/data/storages/set-up-cors.md).
You may now import assets from the private storage by providing Azure Blob URLs in your import JSON. Azure Blob URLs must use this format:
```url
https://.blob.core.windows.net//
```
If a blob is in Azure's `$root` container, the container segment may be omitted. More information on uploading private assets can be found [here](/data/importing-assets/asset-cloud-import.md).
## Additional Security Steps (Optional)
1. Set your container to private by [disallowing anonymous access](https://learn.microsoft.com/en-us/azure/storage/blobs/anonymous-read-access-configure?tabs=portal#permissions-for-disallowing-anonymous-access).
2. You may further limit who can access your container by providing a whitelist of IP ranges. If you choose to do so, please come in contact with the Ango Hub team and we will provide you with the IP addresses you need to include in the whitelist.\
\
To do so, from your storage account, navigate to the *Networking* section. Under the *Public network access* heading, select *Enabled from selected virtual networks and IP addresses*. Lastly, under the *Firewall* section, add the ranges provided to you by the Ango Hub team.
---
# Agent Instructions
This documentation is published with GitBook. GitBook is the documentation platform designed so that both humans and AI agents can read, navigate, and reason over technical content effectively. Learn more at gitbook.com.
## Querying This Documentation
If you need additional information that is not directly available in this page, you can query the documentation by asking a question.
Perform an HTTP GET request on the following URL with the `ask` and `goal` query parameters:
```
GET https://docs.imerit.net/data/storages/set-up-a-storage-integration-with-azure.md?ask=&goal=
```
`ask` is the immediate question: it should be specific, self-contained, and written in natural language.
`goal` is what the user is ultimately trying to achieve, the reason they need the answer. Sharing it helps GitBook give you a better, more relevant answer. A goal is most helpful when it describes the outcome the user wants rather than restating the question. For example, with `ask=how do I create an API token`, a goal like `automate deployments from our CI pipeline` lets GitBook tailor the answer to that use case.
The response will contain a direct answer to the question and relevant excerpts and sources from the documentation.
Use this mechanism when the answer is not explicitly present in the current page, you need clarification or additional context, or you want to retrieve related documentation sections.